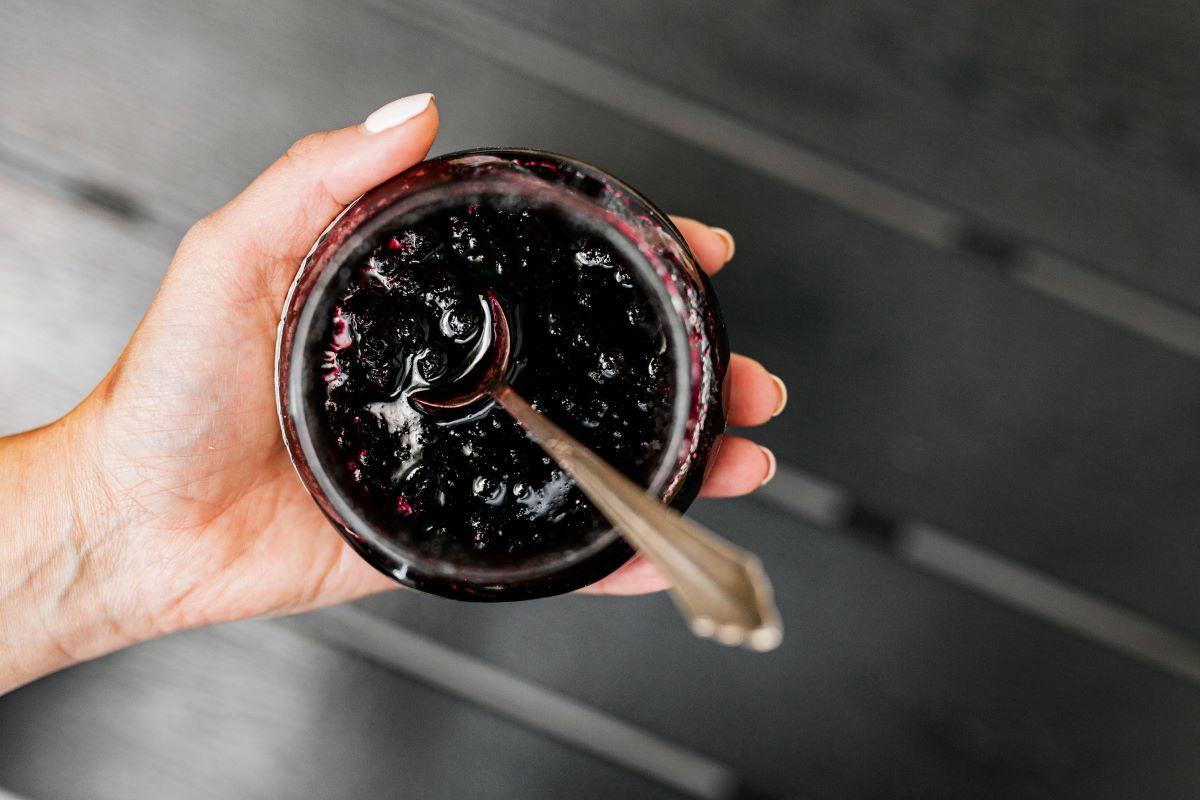
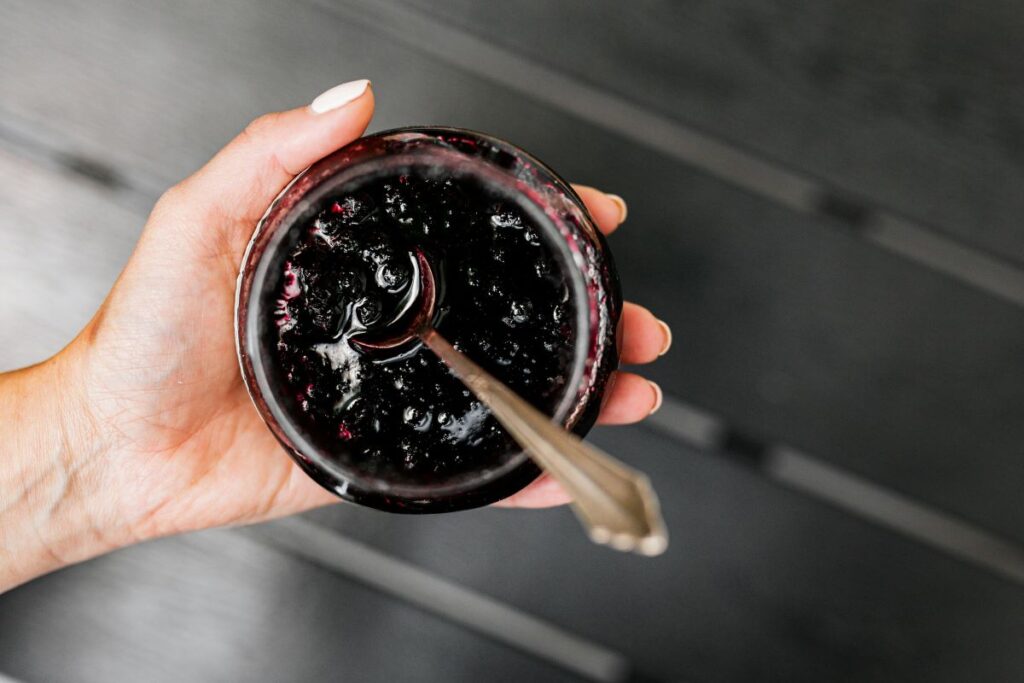
You walk into your kitchen. The air smells like warm berries. Your hands are sticky with sweet juice. On the counter sit jars of deep purple jam. Each one glows like a tiny sunset. This is the magic of making blackberry jam at home. Moreover, it’s a journey that connects us to something deeper. Something real.
I still remember my grandmother’s kitchen. She made jam every August. The whole house smelled like summer. Even now, when I open a jar of homemade jam, I feel her presence. That’s the power of cooking with love. Also, that’s why I want to share this with you.
Making jam isn’t just about preserving fruit. Furthermore, it’s about preserving moments. It’s about creating something beautiful with your own hands. In addition, it’s about sharing sweetness with the people you love. So, let’s dive into this wonderful world together.
Table of Contents
Why Homemade Jam Beats Store-Bought Every Time
First, let’s talk about why homemade jam wins. Store jam often tastes flat. It lacks soul. However, when you make jam at home, magic happens. You control every ingredient. Also, you add something special that no factory can provide. You add your heart.
The difference is clear from the first taste. Homemade jam bursts with flavor. Moreover, it has texture. Some chunks of fruit remain. These little pieces tell a story. They whisper about sunny days and gentle rain. Furthermore, they remind us that real food has character.
Additionally, you decide how sweet to make it. Some people love sugar. Others prefer tart flavors. With homemade jam, you choose. Plus, you know exactly what goes in. No strange chemicals. No artificial colors. Just pure, honest ingredients.
But there’s more. Making jam brings peace. The slow stirring feels like meditation. Also, the gentle bubbling soothes the soul. In our busy world, this simple act grounds us. It connects us to generations before us. People who knew the value of slow cooking and patient hands.
Setting Up Your Jam-Making Station
Before we start cooking, let’s prepare. Good preparation makes everything easier. Also, it prevents stress later. So, gather these items first:
Essential Equipment:
- Fresh blackberries (4 cups)
- Granulated sugar (3 cups)
- Fresh lemon juice (2 tablespoons)
- Pectin (1 packet, optional)
- Large, heavy-bottomed pot
- Wooden spoon or heat-safe spatula
- Glass canning jars with new lids
- Jar lifter or kitchen tongs
- Wide-mouth funnel
- Ladle
- Clean kitchen towels
Next, arrange everything within reach. Put sugar and pectin side by side. Also, keep lemon juice nearby. This way, you won’t scramble during cooking. Furthermore, fill a bowl with ice water. You’ll need this for testing later.
The key is organization. When fruit starts bubbling, you need to move fast. Therefore, having everything ready helps you succeed. Plus, it makes the process more enjoyable. Instead of hunting for tools, you can focus on the magic happening in your pot.
Choosing Perfect Blackberries: The Foundation of Great Jam
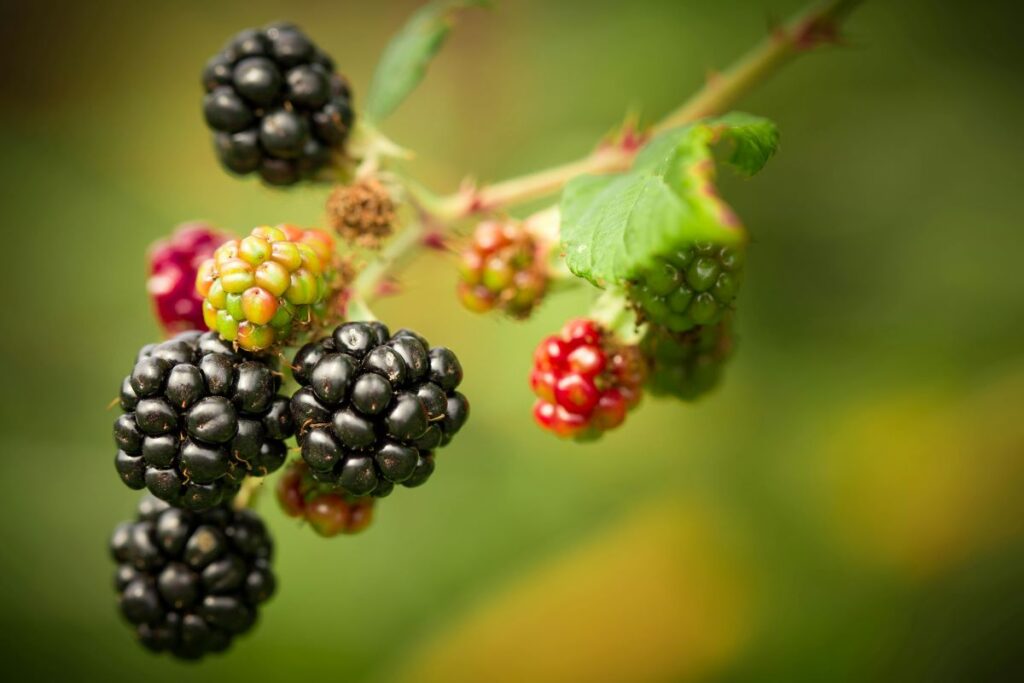
Good jam starts with good fruit. This truth cannot be overstated. Also, the quality of your berries determines the final taste. So, let’s learn how to pick winners.
Look for plump, deep black berries. They should feel firm but give slightly to pressure. Moreover, they should smell sweet and fruity. Avoid berries that look dull or wrinkled. These are past their prime. Similarly, skip any with white or red patches. They’re not ripe yet.
If you’re picking wild berries, choose sunny spots. Berries that get more sun taste sweeter. Also, pick in the morning after dew dries. This prevents water from diluting flavor. Furthermore, bring a shallow basket. Deep containers crush berries at the bottom.
Store-bought berries work well too. However, buy them close to jam-making day. Fresh berries lose flavor quickly. Also, keep them cool but not cold. Room temperature berries release more juice when cooked.
Before cooking, examine each berry. Remove stems and leaves. Also, discard any that look moldy. Then, rinse gently under cool water. Pat them dry with paper towels. This step removes dirt without damaging the fruit.
The Science Behind Perfect Jam: Understanding Your Ingredients
Jam making is both art and science. Understanding the science helps you create better jam. Also, it helps you troubleshoot problems. So, let’s explore what makes jam work.
Sugar’s Role: Sugar does more than sweeten. It also preserves the jam. Additionally, it helps achieve the right texture. Sugar draws water from fruit cells. This process is called osmosis. As water leaves, flavors concentrate. Also, sugar helps jam set properly.
However, you can adjust sugar amounts. Less sugar means more fruit flavor shines through. But it also means softer set. More sugar creates firmer jam. It also extends shelf life. The choice depends on your taste and needs.
Pectin Power: Pectin creates jam’s gel-like texture. All fruits contain some natural pectin. However, amounts vary. Blackberries have medium pectin levels. This means they set reasonably well alone. But adding commercial pectin ensures success.
Natural pectin works best with acid and sugar. The combination creates chemical bonds. These bonds trap water and create gel. Furthermore, heat activates this process. That’s why we boil jam.
Acid’s Importance: Lemon juice adds more than flavor. It also helps pectin work. Acid creates the right pH level for gelling. Without enough acid, jam stays runny. Additionally, acid brightens fruit flavors. It prevents jam from tasting flat.
Some fruits are naturally acidic. Others need help. Blackberries fall in the middle. Adding lemon juice ensures success. Also, it balances sweetness with brightness.
Step-by-Step Journey to Perfect Jam
Now comes the fun part. We’re going to make jam together. Follow these steps carefully. Also, don’t rush. Good jam takes time and attention.
Step 1: Prepare Your Fruit
Start with clean, dry berries. Place them in your large pot. Then, gently mash about half of them. Use a potato masher or large fork. Leave some berries whole. These create lovely texture in finished jam.
The goal is juice release. Mashed berries give up their liquid faster. However, whole berries add character. They create little bursts of flavor. Also, they make jam look more interesting.
Step 2: Add Sugar and Pectin
If using pectin, sprinkle it over fruit first. Stir well to distribute. Then, add sugar gradually. Stir constantly as you add. This prevents lumping. Also, it helps everything dissolve evenly.
Watch the mixture change. Sugar draws juice from berries. Soon, you’ll see more liquid in the pot. This is exactly what we want. The sugar is doing its job.
Step 3: Heat Gently at First
Place pot over medium-low heat. Stir frequently. Don’t rush this step. Gentle heat dissolves sugar completely. Also, it prevents burning. Burned jam tastes bitter. Nobody wants that.
As mixture heats, more juice appears. Keep stirring. Sugar crystals disappear. The mixture becomes more liquid. This process takes about 5 minutes. Be patient. Good things take time.
Step 4: Bring to Rolling Boil
Once sugar dissolves, increase heat to medium-high. Keep stirring. The mixture will bubble more vigorously. We want a rolling boil. This means bubbles that don’t stop when you stir.
Here’s where attention matters most. Stir constantly. Jam can burn quickly at this stage. Also, hot jam splatters. Wear long sleeves if possible. Keep a lid nearby to reduce spattering.
Step 5: Test for Doneness
After boiling one minute, test the set. Drop a small spoonful on a cold plate. Let it sit 30 seconds. Then, tilt the plate. Properly set jam wrinkles when pushed with your finger. If it runs, boil another 30 seconds. Test again.
This step determines success. Under-set jam stays runny. Over-cooked jam becomes too firm. The perfect jam holds its shape but spreads easily. Practice helps you recognize the right consistency.
Step 6: Add Final Touches
Remove pot from heat immediately when jam sets. Stir in lemon juice now. This brightens flavor and adds necessary acid. Also, skim any foam from the surface. Foam looks cloudy. Removing it makes jam shine.
Taste your jam now. Does it need more lemon? Add it gradually. Remember, you can always add more. You can’t take it away. Trust your taste buds. They know what you like.
Step 7: Fill Jars Carefully
Use your funnel to fill sterilized jars. Leave quarter-inch headspace at the top. This space allows for expansion. Also, it helps jars seal properly. Wipe jar rims with damp cloth. Any residue prevents good seals.
Work quickly but carefully. Hot jam burns skin badly. However, don’t let jam cool too much. Cool jam doesn’t pour well. Also, it may not seal properly in jars.
Advanced Techniques for Jam Perfection
After mastering basic jam, try these advanced tips. They separate good jam from great jam. Also, they help you develop your own style.
Flavor Layering: Add vanilla bean while cooking. Split the bean lengthwise. Scrape seeds into jam. Add the empty pod too. Remove pod before jarring. This creates complex, warm flavor.
Alternatively, try fresh herbs. Thyme pairs beautifully with blackberries. So does basil. Add herbs during last few minutes of cooking. Remove them before jarring. The flavor remains without the texture.
Texture Variations: For chunky jam, mash fewer berries. For smooth jam, blend half the fruit before cooking. You can also push finished jam through coarse sieve. This removes seeds while keeping fruit pieces.
Some people love seeds. Others dislike them. Know your audience. Seedless jam appeals to children. However, seeds add nutritional value and authentic texture.
Sugar Alternatives: Honey creates different flavor profile. Replace half the sugar with honey. Add honey near cooking’s end. It burns more easily than sugar. Also, honey jam may set differently. Expect softer consistency.
Maple syrup works too. Use pure syrup, not pancake syrup. The flavor is distinctive but delicious. Again, expect different texture. Natural sweeteners behave differently than refined sugar.
Proper Storage: Making Your Jam Last
Good storage extends jam’s life. Also, it maintains quality and safety. Follow these guidelines for best results.
Hot Water Bath Processing: For long-term storage, process filled jars in boiling water. Submerge jars completely. Boil 10 minutes at sea level. Add one minute for each 1000 feet of elevation. This kills harmful bacteria and creates vacuum seals.
After processing, let jars cool undisturbed. You’ll hear popping sounds. These indicate successful seals. Check seals after 24 hours. Press jar centers. Sealed lids don’t move. Unsealed jars go straight to refrigerator.
Refrigerator Storage: Opened jars belong in refrigerator. Use within one month for best quality. However, jam often stays good longer. Trust your senses. If jam looks, smells, and tastes normal, it’s probably fine.
Store unopened processed jars in cool, dark places. Basements work well. So do pantries away from heat sources. Properly processed jam lasts one year. However, quality peaks in first six months.
Freezer Options: Freezing works for unprocessed jam. Use freezer-safe containers. Leave one-inch headspace for expansion. Frozen jam keeps one year. However, texture changes slightly. Frozen jam works best for cooking or baking.
Label everything clearly. Include date and contents. Memory fades faster than jam spoils. Also, rotate stock. Use older jars first. This prevents waste and ensures peak flavor.
Creative Ways to Enjoy Your Homemade Treasure
Jam deserves more than toast duty. Here are creative ways to showcase your creation. Also, these ideas help you use jam faster.
Breakfast Beyond Toast: Swirl jam into oatmeal or yogurt. The sweetness transforms simple breakfasts. Also, try jam on pancakes or waffles. It’s more interesting than syrup. Furthermore, add jam to smoothies. It provides sweetness and fruit flavor.
Mix jam into cream cheese for bagel spread. The combination is heavenly. Similarly, blend jam with butter for special occasion bread. These simple additions create gourmet experiences.
Dessert Magic: Layer jam between cake layers. It adds moisture and flavor. Also, use jam as tart filling. The intensity works perfectly in pastries. Furthermore, swirl jam through cheesecake batter before baking.
Make jam thumbprint cookies. Press thumb into cookie dough. Fill depression with jam. Bake as usual. These cookies disappear quickly at gatherings.
Savory Applications: Jam works in savory dishes too. Glaze chicken with jam mixed with mustard. The sweet-tangy combination is divine. Also, add jam to salad dressings. It balances acidity beautifully.
Pair jam with cheese. Brie and blackberry jam create perfect harmony. So do goat cheese and jam. Serve with crackers for elegant appetizers. These combinations impress guests while using simple ingredients.
Beverage Enhancement: Stir jam into iced tea or lemonade. It sweetens and flavors simultaneously. Also, add jam to cocktails. Whiskey and blackberry jam create sophisticated drinks. Furthermore, blend jam into milkshakes for fruity richness.
Hot beverages benefit too. Add jam to herbal teas. The fruit complements many flavors. Chamomile and blackberry jam is particularly soothing. These combinations create comfort in cups.
Troubleshooting Common Jam Problems
Even experienced jam makers face challenges. Here’s how to fix common issues. Also, learn how to prevent them next time.
Runny Jam Solutions: If jam won’t set, several factors might be responsible. Insufficient pectin is most common. Also, too little sugar or acid causes problems. Furthermore, undercooking prevents proper set.
To fix runny jam, return it to pot. Add more pectin according to package directions. Boil again until proper set. Test frequently. Over-correction creates rubber-like texture.
Prevention works better than correction. Use proper ratios of fruit, sugar, and acid. Also, cook jam to correct temperature. Candy thermometer helps. Jam sets at 220°F (104°C) at sea level.
Overly Firm Jam: Overcooking creates tough, rubbery jam. Unfortunately, this problem is harder to fix. You can thin jam with water or fruit juice. However, texture never returns to ideal.
Prevention is key. Watch cooking time carefully. Test set frequently. Stop cooking immediately when jam passes plate test. Experience teaches you to recognize perfect consistency.
Crystallized Sugar Issues: Sometimes sugar forms crystals in finished jam. This happens when sugar concentration becomes too high. Also, undissolved sugar can recrystallize later.
Prevent crystals by stirring well during initial heating. Make sure all sugar dissolves before boiling. Also, avoid overcooking. High temperatures encourage crystallization.
Separation Problems: Occasionally, jam separates into liquid and solid portions. This usually indicates insufficient pectin or acid. Also, old fruit may lack natural pectin.
Fix separation by reprocessing jam. Add pectin and lemon juice. Boil briefly to redistribute ingredients. However, prevention works better. Use proper ratios and fresh ingredients.
The Deeper Meaning of Jam Making
Making jam connects us to something important. In our fast-paced world, slow cooking feels revolutionary. Also, creating food with our hands satisfies deep needs. Furthermore, sharing homemade jam builds relationships.
Connection to Seasons: Jam making follows nature’s rhythm. Berries ripen when they’re ready. We can’t rush the process. This teaches patience and acceptance. Also, it connects us to seasonal cycles our ancestors knew well.
Preserved jam extends summer’s bounty through winter. Opening a jar in February brings back August sunshine. This connection to seasons grounds us in natural time rather than artificial schedules.
Mindfulness Practice: Stirring jam requires attention. You can’t multitask while making jam. This forced focus becomes meditation. Moreover, the repetitive stirring soothes busy minds. The process itself becomes as valuable as the product.
Cooking jam engages all senses. We see color changes. We smell fruit aromas. We hear bubbling sounds. We feel texture changes. This sensory richness provides complete presence rarely found in modern activities.
Generational Connections: Jam making links us to previous generations. Recipes pass from grandmother to grandchild. Stories accompany techniques. Moreover, methods remain largely unchanged across decades.
When we make jam, we join an ancient tradition. Humans have preserved fruit for thousands of years. Each jar we fill continues this heritage. Also, it prepares us to pass knowledge forward.
Gift of Love: Homemade jam makes meaningful gifts. Unlike purchased items, jam contains your time and effort. Recipients understand this difference. Also, homemade jam shows thoughtfulness that money can’t buy.
Sharing jam creates connections. Friends remember your gift long after eating jam. Moreover, they often request recipes. This sharing builds community around common interests.
Seasonal Variations and Recipe Adaptations
While blackberries shine alone, combining fruits creates new flavors. Also, seasonal availability encourages experimentation. Try these variations throughout the year.
Mixed Berry Combinations: Combine blackberries with raspberries for complex flavor. Use equal amounts of each. The combination balances blackberry earthiness with raspberry brightness. Also, try adding blueberries for different color and taste.
Strawberry and blackberry jam appeals to many palates. Use two parts strawberries to one part blackberries. The strawberries provide sweetness. Blackberries add depth and color.
Seasonal Additions: Late summer allows peach and blackberry combinations. The fruit seasons overlap slightly. Peaches add sweetness and different texture. Moreover, the color combination is beautiful.
Apple season enables interesting possibilities. Add diced apples to blackberry jam. Apples provide natural pectin and mild flavor. They also extend berry flavor with economical fruit.
Holiday Spice Versions: Winter holidays call for spiced jams. Add cinnamon stick while cooking. Remove before jarring. The warm spice complements blackberry flavor perfectly.
Try whole cloves or star anise for exotic variations. These spices transform familiar jam into something special. Also, ground ginger adds warmth without overpowering fruit flavor.
Low-Sugar Alternatives: Health-conscious cooks appreciate low-sugar options. Special low-sugar pectins enable successful jam with less sweetener. Follow package directions carefully. Results differ from traditional recipes.
Natural sweeteners offer alternatives. Stevia works in small amounts. However, too much creates bitter aftertaste. Experiment with ratios to find your preference.
Building Confidence Through Practice
First batches rarely achieve perfection. However, each attempt teaches valuable lessons. Also, even imperfect jam usually tastes good. Don’t let fear prevent you from trying.
Start with small batches. Half recipes reduce waste if results disappoint. Also, small batches teach techniques without large investment. Success with small batches builds confidence for larger projects.
Keep detailed notes. Record fruit amounts, cooking times, and results. These notes help you repeat successes. Also, they help you avoid previous mistakes. Furthermore, notes track your progress over time.
Join jam-making communities online or locally. Other makers share experiences and tips. Also, they provide encouragement when batches fail. Moreover, communities often organize fruit-sharing arrangements.
Embracing Imperfection: Remember that homemade food has character. Slight variations in color or texture add charm. Store-bought products look identical. Homemade jam shows human hands created it.
Even failed batches have uses. Runny jam works as syrup. Too-firm jam can be thinned. Slightly burned jam might work in baking. Creativity salvages most mistakes.
Learning from Mistakes: Each problem teaches important lessons. Burned jam reminds us to stir constantly. Runny jam shows importance of proper ratios. These lessons improve future batches.
Experienced jam makers all have failure stories. These stories become treasured memories. Also, they demonstrate that success comes through practice, not perfection.
The Joy of Sharing Your Creation
Finally, jam making reaches fulfillment through sharing. Giving jam shows care in tangible form. Also, recipients understand the effort involved. This understanding deepens appreciation.
Thoughtful Presentation: Beautiful jars enhance jam’s appeal. Invest in attractive containers. Also, create nice labels with contents and date. Furthermore, add ribbon or fabric covers for special occasions.
Photography preserves memories. Document your jam-making process. Share photos with friends and family. Also, create albums showing seasonal jam varieties. These visual records become treasured keepsakes.
Building Traditions: Consider establishing jam-making traditions. Annual berry-picking expeditions create family memories. Also, gift jams during holidays. These traditions provide continuity across years.
Teach children jam-making techniques. Start with simple tasks like washing fruit. Gradually increase their involvement. Moreover, let them help choose flavor combinations. These experiences create lifelong appreciation for homemade food.
Creating Community: Organize jam-making parties with friends. Share equipment and knowledge. Also, everyone takes home different flavors. These gatherings combine productivity with socializing.
Consider selling jam at farmers markets. This provides income while sharing your craft. Also, customer feedback helps improve techniques. Moreover, selling jam connects you with broader community.
Conclusion: Your Sweet Journey Begins
Making blackberry jam transforms simple ingredients into liquid sunshine. Moreover, the process connects us to traditions, seasons, and community. Each jar holds more than preserved fruit. It contains memories, love, and satisfaction of creating something beautiful.
Your first batch might not be perfect. However, it will be yours. Also, it will taste infinitely better than store-bought alternatives. Furthermore, each subsequent batch will improve as you gain experience.
So gather your berries. Heat your pot. Stir with patience and love. Then, watch as simple fruit becomes something magical. Your kitchen will smell like summer. Your jars will glow like jewels. Moreover, your heart will fill with pride at creating something wonderful with your own hands.
The sweetest part isn’t the first taste. Instead, it’s the moment you share your creation with someone special. Their smile will tell you everything. Also, their appreciation will motivate future jam-making adventures.
Welcome to the wonderful world of jam making. Your sweet journey begins now. Every stir, every bubble, every sealed jar brings you closer to mastering this ancient art. Moreover, each batch connects you to countless generations who found joy in preserving summer’s bounty.
Start today. Your future self will thank you. Also, your family and friends will treasure your homemade gifts. Most importantly, you’ll discover the deep satisfaction that comes from creating something beautiful, delicious, and meaningful with your own hands.
The berries are waiting. The jars are ready. Your jam-making adventure begins now.