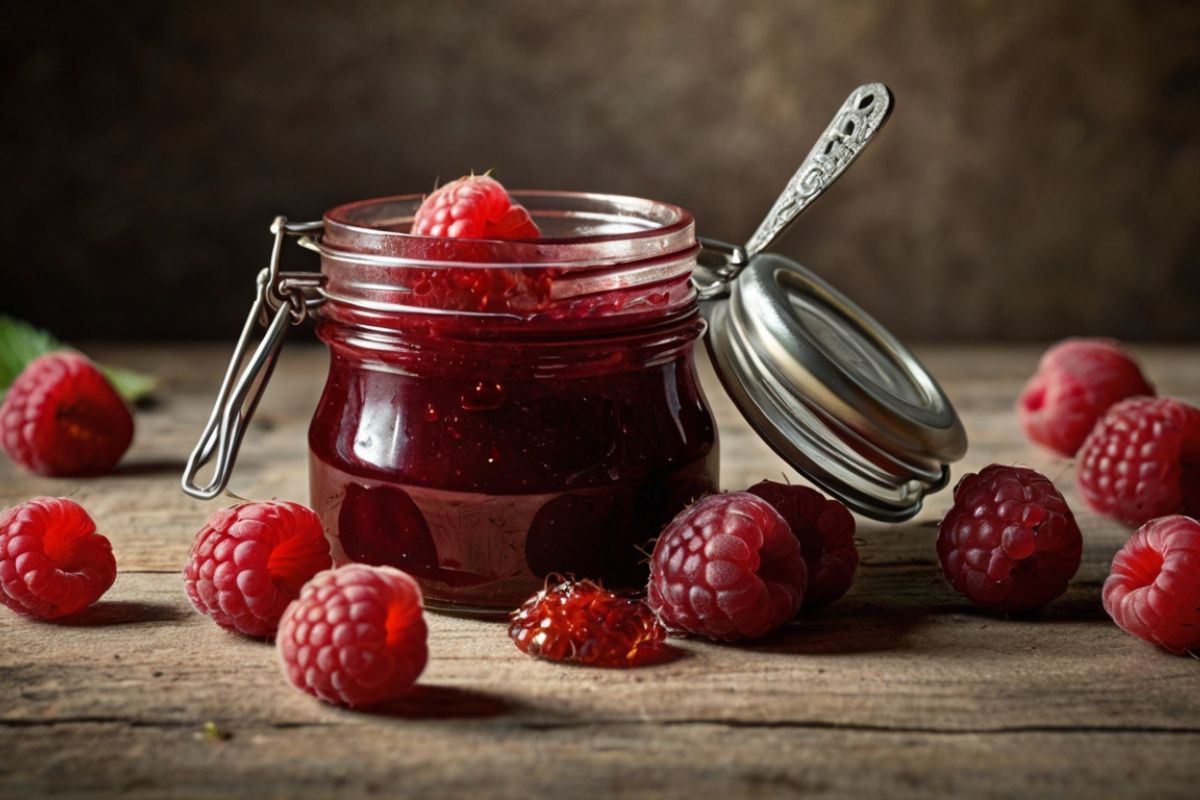
Do you smell that? That sweet, tart smell of berries cooking? It takes me back to childhood. My grandmother stood at her stove. She stirred a pot of bubbling berries. The kitchen filled with warmth. Also, it filled with love.
Making jam at home is like that. It connects us to old ways. Furthermore, it gives us control over what we eat. Store jam tastes flat. Moreover, it has too much sugar. Sometimes it has weird stuff we can’t pronounce. But homemade jam? It bursts with real flavor.
I have made jam for twenty years. At first, I failed a lot. Some batches were too runny. Others were too thick. However, I learned from each mistake. Now I want to share what works. This guide will help you succeed. Also, it will help you avoid my early mistakes.
Table of Contents
Why Homemade Jam Beats Store-Bought Every Time

Fresh Flavor That Actually Tastes Like Fruit
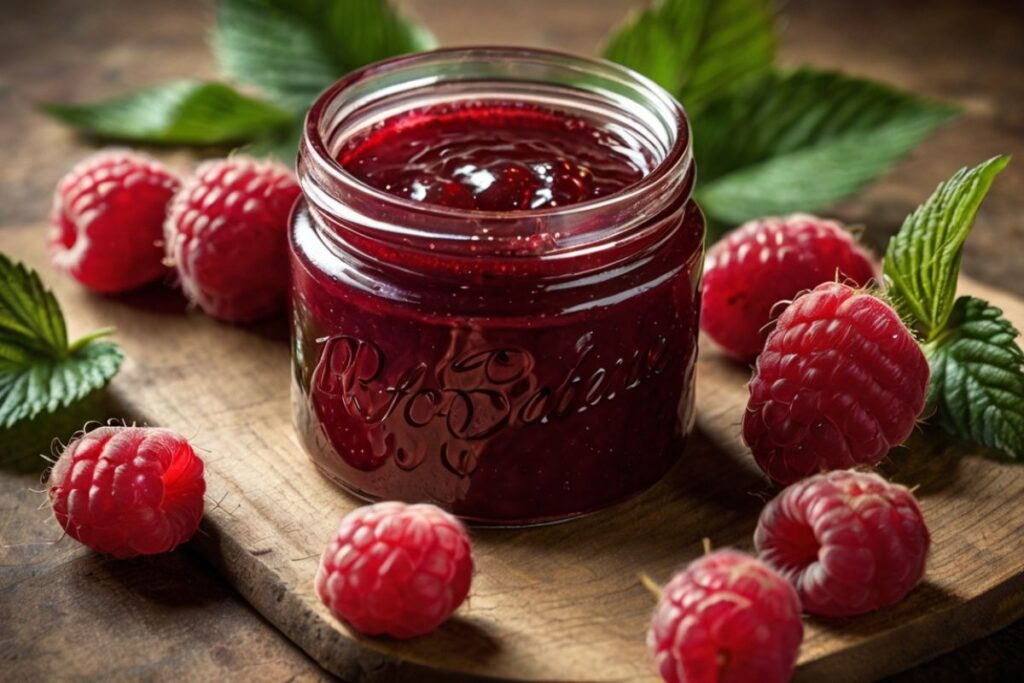
Store jam sits on shelves for months. The bright berry taste fades. Moreover, companies cook it at high heat. This kills the fresh flavor. However, home jam uses ripe berries. You cook them gently. As a result, the taste stays bright and true.
I remember my first homemade batch. The color was deeper. The smell was stronger. Most importantly, it tasted like real raspberries. My kids noticed too. They said it was “more berry-ish.” That made me smile.
You Control Every Single Ingredient
Big companies add lots of sugar. They also add corn syrup. Sometimes they add artificial colors. Why? Because it’s cheaper. However, you don’t need all that stuff.
At home, you choose how sweet it is. You can use less sugar. You can try honey instead. Furthermore, you can add spices. Or herbs. The choice is yours.
No Weird Additives or Preservatives
Look at a jar of store jam. The label lists many things. Some have names you can’t say. These keep jam stable on shelves. But do you need them? No, you don’t.
Homemade jam has simple ingredients. Berries, sugar, and lemon juice. That’s it. Clean ingredients make better jam. Also, they make you feel better about what you eat.
It’s Actually Fun and Rewarding
Making jam is like magic. You start with plain berries. Then you add heat and time. Soon, you have thick, glossy jam. The process is satisfying. Moreover, it fills your house with amazing smells.
My kids love to help. They wash berries. They stir the pot. We talk while we work. These moments matter. They create memories that last.
Perfect Gifts That Show You Care
Homemade jam makes great gifts. People love getting it. Why? Because it shows effort. It shows you thought about them. Also, it’s useful.
I give jam at holidays, make pretty labels, and tie ribbons on jars. Friends always smile when they get them. They know I made it just for them.
The Science Behind Perfect Jam
Understanding Pectin and How It Works
Pectin is what makes jam thick. It’s natural. Fruits have it. However, some fruits have more than others. Raspberries have some. But not tons.
When you heat fruit with sugar and acid, pectin activates. It forms a gel. This is why jam thickens. Understanding this helps you make better jam.
Commercial pectin speeds things up. It also makes jam firmer. But you don’t need it. Natural pectin works fine. It just takes longer.
The Role of Sugar (It’s Not Just for Sweetness)
Sugar does more than make jam sweet. It also helps jam set. How? It helps pectin form gels. Moreover, it preserves the jam. Sugar prevents bacteria growth.
Can you use less sugar? Yes, but jam won’t set as well. It also won’t last as long. Therefore, find the right balance for your taste.
Why Acid Matters for Perfect Texture
Lemon juice isn’t just for flavor. The acid helps pectin work. Without acid, jam stays runny. Also, acid brightens the berry flavor. It makes colors more vivid too.
Some recipes use vinegar instead. However, I prefer lemon juice. It tastes better. Plus, it’s more natural.
Choosing the Perfect Raspberries
Fresh vs. Frozen: What Works Best
Fresh berries make the best jam. They have more flavor. Also, they have better texture. However, frozen berries can work. Use them when fresh ones cost too much.
If using frozen berries, don’t thaw them first. Add them frozen to the pot. They’ll release juice as they heat. This actually helps the jam process.
Signs of Perfect Ripeness
Good raspberries have deep color. They smell sweet. Moreover, they feel firm but give slightly when pressed. Avoid berries that are mushy. Skip ones that smell sour too.
The best berries come from local farms. Visit during peak season. Usually that’s mid to late summer. Talk to farmers. They know which berries taste best.
How Much You Really Need
This recipe uses four cups of berries. That makes about four small jars. However, you can double it. Or triple it. Just keep the ratios the same.
Measure berries after washing. Don’t pack them down. Just fill the cup gently. This gives accurate measurements.
Essential Tools for Jam Success
The Right Pot Makes All the Difference
Use a heavy-bottomed pot. Why? It heats evenly. Thin pots create hot spots. These burn the jam. Also, use a wide pot. This helps water evaporate faster.
I use a stainless steel pot. It doesn’t react with acid. Cast iron works too. However, avoid aluminum. It can make jam taste metallic.
Wooden Spoons Are Your Friend
Wooden spoons don’t scratch pots. They also don’t conduct heat. Your hand stays cool. Moreover, wood doesn’t react with acid.
I have a special jam spoon. It’s flat on one end. This helps scrape the pot bottom. It prevents sticking.
Proper Canning Equipment
You need canning jars. Buy new ones for best results. Also, get new lids. Old lids might not seal well.
A jar lifter helps move hot jars safely. A canning funnel reduces spills. These tools aren’t expensive. But they make the job much easier.
Testing Tools for Perfect Consistency
Keep a plate in the freezer. This tests if jam is ready. Also, have a candy thermometer. Jam sets at 220°F. However, the plate test works better.
Some people use the spoon test. When jam sheets off the spoon, it’s ready. This takes practice though. The plate test is more reliable.
Step-by-Step Jam Making Process
Preparing Your Workspace
First, clear your counter space. You’ll need room for hot jars. Also, lay out towels. These protect surfaces from heat.
Fill a large pot with water. Add the empty jars. Bring to a boil. This sterilizes jars. Hot jars also prevent cracking when you add hot jam.
Preparing the Berries Properly
Wash berries gently in cool water. Don’t soak them. They absorb water and lose flavor. Pick out any stems or leaves. Also, remove any moldy berries.
Put berries in a large bowl. Use a potato masher. Crush them lightly. You want some chunks left. This gives jam better texture.
The Perfect Sugar-to-Fruit Ratio
I use two cups sugar to four cups berries. This makes mildly sweet jam. If you like it sweeter, add more sugar. For less sweet jam, use less sugar.
Mix sugar with crushed berries. Let it sit for ten minutes. The sugar draws out berry juices. This helps jam set better.
Cooking Process: Step by Step
Put the berry mixture in your pot. Add lemon juice. If using pectin, add it now. Stir everything together.
Turn heat to medium. Stir constantly. The sugar will dissolve. This takes about five minutes. Don’t rush this step.
Once sugar dissolves, increase heat. Bring to a rolling boil. This means it bubbles even when you stir. Keep stirring constantly.
If using pectin, boil for one minute. Without pectin, boil longer. Usually ten to fifteen minutes. Test often with the cold plate.
Testing for Doneness
Put a small spoonful of jam on the cold plate. Push it with your finger. If it wrinkles, it’s ready. If it runs, cook longer.
Another test: Dip a cold spoon in jam. If it coats thickly and drips slowly, it’s done. This takes practice to judge right.
Removing Foam for Clear Jam
Skim foam with a spoon. Foam looks cloudy in jars. Removing it makes prettier jam. Don’t worry if you miss some. It won’t hurt anything.
The foam actually tastes good. I let my kids eat it. They think it’s a special treat.
Filling Jars the Right Way
Remove hot jars with jar lifter. Place on towels. Use a canning funnel. This prevents spills.
Ladle hot jam into jars. Leave quarter-inch space at the top. This is called headspace. It’s needed for proper sealing.
Wipe jar rims with a damp cloth. Any jam residue prevents sealing. Place new lids on jars. Screw on rings finger-tight. Don’t over-tighten.
Processing for Long-Term Storage
Lower filled jars into boiling water. Make sure water covers jars by one inch. Bring back to boiling. Start timing now.
Process for ten minutes. This kills any bacteria. It also creates vacuum seals. After processing, remove jars carefully. Place on towels to cool.
Advanced Tips for Perfect Jam Every Time
Weather and Humidity Effects
High humidity affects jam setting. On very humid days, jam takes longer to set. Also, it might need more acid. Add an extra tablespoon of lemon juice.
Low humidity has the opposite effect. Jam might set too fast. Watch it carefully. Test frequently.
Altitude Adjustments
High altitude affects boiling point. Water boils at lower temperatures. This means longer processing times. Add two minutes for every 1000 feet above sea level.
Also, jam might not set as well. The lower air pressure affects pectin. You might need to cook longer or add pectin.
Preventing Sugar Crystals
Sugar crystals make jam gritty. To prevent them, dissolve sugar completely before boiling. Also, don’t stir once hard boiling starts.
If crystals form, add a bit of lemon juice. This usually dissolves them. However, prevention works better than fixing.
Achieving Perfect Consistency
Some people like thick jam. Others prefer it thinner. Cook longer for thick jam. Add water for thinner jam.
Remember, jam thickens as it cools. Hot jam looks thinner than finished jam. Account for this when testing.
Creative Flavor Variations
Honey-Sweetened Raspberry Jam
Replace half the sugar with honey. This creates complex flavor. However, honey jam doesn’t set as firmly. Also, it browns more during cooking.
Use light-colored honey. Dark honey overpowers berry flavor. Clover or wildflower honey work well.
Spiced Raspberry Jam
Add whole spices while cooking. Cinnamon sticks work great. So do vanilla beans. Remove spices before jarring.
Ground spices work too. Use them sparingly. Start with quarter teaspoon. You can always add more next time.
Herbal Infusions
Fresh herbs add interesting flavors. Mint pairs well with raspberries. So does basil. Add herb sprigs while cooking. Remove before jarring.
Lavender is popular too. However, use very little. It’s strong. Too much makes jam taste soapy.
Mixed Berry Combinations
Combine raspberries with other berries. Strawberries add sweetness. Blackberries add depth. Blueberries add color.
Keep total fruit amount the same. Just vary the types. This creates unique flavors each time.
Low-Sugar Options
You can reduce sugar significantly. However, jam won’t set as well. It also won’t keep as long. Consider using natural fruit sweeteners.
Stevia works for some people. However, it doesn’t help jam set. You might need added pectin. Apple juice concentrate adds sweetness naturally.
Storage and Shelf Life Guidelines
Proper Storage Conditions
Store unopened jars in cool, dark places. Basements work well. So do pantries. Avoid places with temperature swings.
Check seals regularly. Properly sealed jars last one year. Sometimes longer. However, quality slowly decreases over time.
Signs of Spoilage
Mold is obvious spoilage. Throw away moldy jam immediately. Also watch for bulging lids. These indicate bacterial growth.
Off smells mean spoilage too. Good jam smells fruity. Bad jam smells yeasty or alcoholic. When in doubt, throw it out.
Freezer Storage Options
Freeze jam in freezer-safe containers. Leave half-inch headspace. Frozen jam lasts up to one year. However, texture changes slightly.
Thaw frozen jam in the refrigerator. Don’t refreeze after thawing. Use within one month of thawing.
Refrigerator Life After Opening
Opened jam keeps in the fridge for one month. Sometimes longer if handled cleanly. Always use clean spoons. This prevents contamination.
Cover jam tightly after each use. Air exposure causes flavor loss. It also promotes mold growth.
Nutritional Benefits and Considerations
Vitamins and Minerals
Raspberries provide vitamin C. They also have iron and fiber. Cooking reduces some vitamins. However, many remain.
Homemade jam has more nutrients than commercial jam. Why? You use more fruit per jar. Also, gentler cooking preserves more vitamins.
Sugar Content Reality
Jam is high in sugar. Even homemade versions. However, you control how much sugar goes in. This gives you options.
Consider portion sizes. A tablespoon of jam has about 50 calories. Most of these come from sugar. Enjoy jam in moderation.
Dietary Modifications
Make jam suitable for different diets. Use coconut sugar for paleo diets. Try maple syrup for natural sweeteners. However, these change texture and flavor.
For diabetics, consider sugar-free options. Special pectins work with artificial sweeteners. Follow package directions carefully.
Serving Ideas and Pairings
Classic Applications
Spread jam on toast or biscuits. This is the classic use. However, try different breads. Sourdough adds tang. Whole grain adds texture.
Scones and jam make perfect partners. The buttery scone balances tart jam. This combination feels elegant yet simple.
Creative Culinary Uses
Stir jam into plain yogurt. This creates instant fruit yogurt. It’s cheaper than store-bought versions. Also, you control sweetness.
Use jam in baking. Fill thumbprint cookies. Swirl it through cheesecake. Create jam-filled muffins. These uses showcase homemade quality.
Savory Applications
Jam works in savory dishes too. Glaze roasted chicken with jam. Mix it into salad dressings. These applications surprise people.
Cheese and jam pairings are classic. Try brie with raspberry jam. The creamy cheese balances tart fruit. Goat cheese works well too.
Beverage Applications
Mix jam into sparkling water. This creates natural fruit soda. Much healthier than commercial versions. Kids love this treat.
Add jam to cocktails. It sweetens naturally. Also provides interesting flavors. Muddle it with fresh herbs for complexity.
Troubleshooting Common Problems
Runny Jam Solutions
If jam won’t set, don’t panic. You have options. First, cook it longer. Test frequently with cold plate method.
Another option: Add pectin. Mix it with sugar first. Then stir into hot jam. Bring back to boiling. This usually works.
Overly Thick Jam
Too-thick jam isn’t ruined. Add warm water gradually. Stir well between additions. This thins jam to desired consistency.
Heat jam gently while thinning. This helps water incorporate evenly. Don’t add cold water to hot jam. This causes uneven texture.
Crystal Formation Issues
Sugar crystals make jam gritty. Usually caused by undissolved sugar. Or stirring during hard boiling. Prevention works better than fixing.
To fix crystallized jam, reheat gently. Add small amount of water. Stir until crystals dissolve. Then cool without stirring.
Color Problems
Sometimes jam turns brown. This usually means too much heat. Or cooking too long. While still edible, it’s not pretty.
Prevent browning by using medium heat. Also, don’t cook longer than necessary. Test frequently to avoid overcooking.
Jar Sealing Failures
If jars don’t seal, refrigerate immediately. Use within one month. Or reprocess with new lids. Check jar rims for chips too.
Common sealing problems: dirty rims, old lids, or under-processing. Prevention is key. Keep everything clean and follow timing exactly.
Making Jam a Family Tradition
Teaching Kids to Cook
Making jam is perfect for teaching kids. It’s safe and fun. Kids can wash berries. They can help measure ingredients. Simple tasks build confidence.
My son started helping at age five. Now he’s ten and makes jam alone. These skills will serve her well. Moreover, we have great memories.
Seasonal Traditions
Make jam when berries are in season. This connects us to natural rhythms. Also, seasonal fruit tastes better. And costs less too.
We visit berry farms each summer. The kids pick berries. Then we come home and make jam. It’s our summer tradition. These experiences matter.
Gift-Giving Opportunities
Homemade jam makes meaningful gifts. Put it in pretty jars. Add handwritten labels. People treasure these personal touches.
I make extra batches for holidays. Christmas jam with cinnamon. Valentine’s jam with roses. These themed versions feel special.
Preserving Family Recipes
Document your jam recipes. Include notes about what works. This preserves family traditions. Future generations will appreciate these records.
Take photos of the process. Kids love seeing themselves cooking. These pictures become treasured memories. They also help remember techniques.
Conclusion: Your Journey to Perfect Jam
Making raspberry jam connects us to simple pleasures. It slows us down in good ways. Moreover, it produces something useful and delicious.
Don’t worry about perfection at first. Every batch teaches something new. Some will be too thick. Others might be too thin. However, they’ll all taste better than store-bought versions.
Start small with this basic recipe. Then experiment with flavors. Try different berries. Add spices. Create your own signature versions.
Most importantly, enjoy the process. Savor the smells. Appreciate the colors. Share the results with people you love. This simple act creates connections that matter.
Your first batch awaits. Gather those berries. Fire up the stove. Soon your kitchen will smell amazing. More importantly, your family will taste the love you put in every jar.
The satisfaction of homemade jam lasts long after the last spoonful. It’s worth every minute spent stirring that pot. Now go make something delicious. Your taste buds will thank you.