Greek yogurt, with its creamy texture and tangy flavor, has become a staple in many households. It’s not just a delicious snack; it’s also packed with probiotics, protein, and essential nutrients.
While store-bought options abound, making your own Greek yogurt at home allows you to control the quality of ingredients and tailor it to your taste preferences.
In this complete guide, we’ll delve into the art of crafting homemade Greek yogurt from scratch. From choosing the right milk to achieving that perfect creamy consistency, we’ll cover every step of the process.
Also Read: What is Greek Yogurt? – Its Origin, Nutrition, Benefits, Risks & All.
Table of Contents
Ingredients You’ll Need
1. Milk Selection:
The type of milk you choose plays a pivotal role in the final texture and flavor of your Greek yogurt. Whole milk, with its higher fat content, yields an exceptionally creamy result.
If you’re looking for a lighter option, low-fat or skimmed milk can also be used. For those with dietary restrictions, non-dairy options like almond, soy, or coconut milk can be substituted. Just ensure they’re fortified with calcium and vitamin D.
Additionally, it’s recommended to opt for organic, pasteurized, and unhomogenized milk. These variations tend to produce a smoother consistency and more balanced flavor.
Avoid ultra-pasteurized milk, as the high heat processing can sometimes lead to inconsistent results.
Read: Why Greek Yogurt Is Bad For You?
2. Yogurt Starter:
Your choice of yogurt starter is crucial as it introduces the live, active bacterial cultures necessary for fermentation.
You can use a small amount of plain, unsweetened, and live-culture yogurt from a previous batch, or opt for a store-bought variety.
Look for yogurt with a label indicating “live cultures” or “probiotics”. It’s advisable to select a yogurt that aligns with your taste preferences, as its flavor will influence the final product.
Read: Why is Greek Yogurt Good For You?
3. Equipment:
Having the right tools on hand ensures a smooth yogurt-making process. A heavy-bottomed saucepan helps prevent scorching of the milk, while a reliable cooking thermometer ensures precise temperature control.
A whisk aids in mixing the yogurt starter evenly, and a clean kitchen towel or cheesecloth facilitates the straining process if you choose to make Greek-style yogurt.
Lastly, a large bowl with a lid for refrigeration and a warm, consistent environment for incubation are essential.
Remember, investing in quality equipment can make the yogurt-making process more enjoyable and yield better results.
By paying attention to these ingredients and their nuances, you’ll set the stage for a successful yogurt-making adventure.
Experimenting with different milk types and yogurt starters can lead to a customized Greek yogurt that perfectly suits your palate.
Read: How Long Does Greek Yogurt Last? – Shelf Life Guidelines.

Step 1: Selecting the Right Milk
Selecting the right milk is a crucial first step in the process of making Greek yogurt. Here, we’ll delve into more details to help you make an informed decision:
- Milk Fat Content: The fat content of the milk you choose significantly impacts the creaminess and richness of your Greek yogurt. Whole milk, with its higher fat content, produces an incredibly velvety and indulgent yogurt. It’s the classic choice for those seeking a luscious, full-bodied texture. However, if you’re looking for a lighter option, low-fat or skimmed milk can also be used. These will yield a yogurt with a leaner profile, but it may not be as luxuriously creamy.
- Milk Quality: Opt for high-quality milk to ensure the best results. Organic milk, which is free from synthetic hormones and antibiotics, is a preferred choice. Look for milk that is pasteurized but not ultra-pasteurized. Ultra-pasteurization involves heating the milk to very high temperatures, which can sometimes result in a less favorable texture and taste in the final yogurt.
- Homogenization: Consider whether the milk has been homogenized. Homogenization is a process that breaks down fat molecules to create a uniform texture. While it’s not a necessity for making yogurt, some may prefer the smoother consistency it imparts.
- Non-Dairy Alternatives: For those with dietary restrictions or preferences, non-dairy milk alternatives like almond, soy, coconut, or oat milk can be used. Ensure they are fortified with essential nutrients like calcium and vitamin D, which are naturally present in dairy milk.
- Quantity of Milk: The amount of milk you use will determine the quantity of yogurt produced. A standard ratio is one quart (four cups) of milk to yield approximately one quart of yogurt. You can adjust this ratio based on your preferences and the capacity of your equipment.
Choosing the right milk is the foundation of creating exceptional Greek yogurt. By considering factors like fat content, quality, and any dietary considerations, you can tailor your yogurt-making experience to your taste and nutritional preferences.
Learn: How to Tell If Greek Yogurt Is Bad?
Step 2: Heating the Milk
Heating the milk is a critical step in the yogurt-making process. Let’s explore this step in greater detail:
- Choosing the Right Pot: Use a heavy-bottomed saucepan for heating the milk. This type of pot helps distribute heat evenly and prevents scorching, ensuring that the milk heats uniformly.
- Monitoring Temperature: To achieve the desired results, it’s crucial to monitor the temperature of the milk. A cooking thermometer is an indispensable tool for this step. Ensure that it’s accurate and can measure temperatures in the range of 0-200°F (0-100°C).
- Gradual Heating Process: Begin by placing the saucepan over medium heat. Gradually increase the temperature to avoid overheating. The goal is to bring the milk to a temperature of 180°F (82°C). This step serves two purposes: it sterilizes the milk, killing any unwanted bacteria, and it denatures the proteins, which is essential for the yogurt’s texture.
- Avoiding Boiling: It’s crucial to watch the milk carefully to prevent it from boiling. Boiling can cause the milk to scald and result in an undesirable texture in the final yogurt.
- Stirring (Optional): While not strictly necessary, some individuals prefer to gently stir the milk during the heating process. This can help distribute heat and ensure uniform heating.
- Cooling Down: Once the milk reaches 180°F (82°C), remove it from heat and allow it to cool. Cooling is a crucial step as it creates an environment conducive for the yogurt cultures to thrive during the incubation process.
- Alternative Heating Methods: If you have a yogurt maker with a heating function, this can be used as an alternative to stovetop heating. It provides a controlled and consistent environment for the milk.
Taking the time to heat the milk properly sets the stage for successful yogurt-making.
By using a heavy-bottomed saucepan, monitoring the temperature, and being attentive to the heating process, you’ll ensure that your yogurt has a smooth texture and a delightful, tangy flavor.
Read: How Long is Greek Yogurt Good for After Opening?

Step 3: Cooling the Milk
Cooling the milk is a pivotal step in the yogurt-making process. Let’s delve deeper into the specifics:
- Optimal Cooling Temperature: After the milk has been heated to 180°F (82°C), it’s essential to bring it down to approximately 110°F (43°C). This temperature range creates an ideal environment for the live yogurt cultures to flourish during the fermentation process.
- Natural Cooling vs. Speeding up the Process: You have two main options for cooling the milk:
- Natural Cooling: Simply allow the milk to cool at room temperature. This process might take anywhere from 30 minutes to an hour, depending on the ambient temperature. Avoid placing the hot saucepan in a cold water bath, as rapid cooling can lead to an uneven texture in the yogurt.
- Water Bath Method (Optional): If you’re short on time, you can create a cold water bath by placing the saucepan in a larger container filled with cold water and ice. Stir the milk gently to facilitate even cooling. This method can speed up the process considerably.
- Monitoring Temperature: Use the cooking thermometer to keep an eye on the temperature as the milk cools. This ensures that it reaches the optimal range for inoculating with yogurt cultures.
- Patience is Key: It’s important not to rush this step. Allowing the milk to cool gradually ensures a stable environment for the yogurt cultures to thrive.
- Avoiding Contaminants: During the cooling process, be mindful of any potential contaminants. Keep the saucepan covered with a clean kitchen towel or lid to prevent dust or foreign particles from falling into the milk.
- Testing Temperature: To ensure the milk has cooled adequately, you can use a clean spoon to drip a small amount on the inside of your wrist. It should feel warm but not uncomfortably hot.
Properly cooling the milk is a crucial aspect of creating a successful batch of Greek yogurt.
By following these steps, you’ll set the stage for a rich, creamy, and delicious final product. Remember, patience during this step pays off in the end!
Step 4: Inoculating with Yogurt Starter
Inoculating the cooled milk with a yogurt starter is a pivotal step in the yogurt-making process. Here’s a closer look at this crucial phase:
- Preparing the Yogurt Starter: In a small bowl, take about 2 tablespoons of live, active yogurt. This can be either from a previous batch you’ve made or a store-bought variety. Ensure that the yogurt you choose is plain, unsweetened, and contains live cultures. These active cultures are the “good” bacteria that will transform the milk into yogurt.
- Mixing with Cooled Milk: Add a few tablespoons of the cooled milk to the yogurt starter. Gently whisk the mixture until it becomes smooth and well combined. This step is essential for ensuring an even distribution of the live cultures throughout the milk.
- Inoculating the Milk: Pour the yogurt-starter mixture back into the larger batch of cooled milk. Use a whisk to gently combine the mixture. This step introduces the live cultures into the milk, kickstarting the fermentation process.
- Ensuring Even Distribution: Take care to thoroughly blend the yogurt starter with the milk. This helps ensure that the live cultures are evenly distributed, which in turn leads to a consistent texture and flavor in the final yogurt.
- Alternative Inoculation Methods: In addition to using pre-made yogurt as a starter, you can also use freeze-dried yogurt starter cultures. These are available in powder form and can be found at specialty food stores or online. Follow the instructions on the packaging for the appropriate quantity to use.
- Maintaining Sterility: It’s crucial to maintain a clean and sterile environment during this step. This helps prevent the introduction of unwanted bacteria that could interfere with the fermentation process.
Inoculating the milk with the yogurt starter is where the magic begins. The live cultures will work their transformative powers on the milk, turning it into creamy, tangy yogurt over the course of the incubation period.
By ensuring a thorough mixing of the yogurt starter, you’re setting the stage for a successful batch of Greek yogurt.
Step 5: Incubation
Incubation is the heart of yogurt-making, where the live cultures work their magic on the milk. Let’s dive deeper into this crucial step:
- Creating the Right Environment: After inoculating the milk with the yogurt starter, it’s time to provide a warm and stable environment for the fermentation process. There are several options:
- Oven with Light On: Place the covered bowl in the oven with the light turned on. This creates a consistently warm environment ideal for yogurt-making. Ensure that the oven is turned off, as the residual heat from the light is sufficient.
- Yogurt Maker: If you have a yogurt maker, simply follow the manufacturer’s instructions. These devices are designed to maintain a steady temperature conducive to yogurt fermentation.
- Warm Countertop: If you don’t have an oven with a light or a yogurt maker, you can place the covered bowl on a warm countertop. You may want to insulate it by wrapping a towel around the bowl.
- Incubation Duration: The length of the incubation period depends on your taste preferences. A shorter incubation time of around 4 to 6 hours will result in a milder, less tangy yogurt with a softer texture. Extending the incubation period to 10 to 12 hours will yield a thicker, tangier yogurt. Experimentation will help you discover the perfect incubation time for your preference.
- Checking for Set: After the chosen incubation period, carefully uncover the bowl and check for signs that the yogurt has set. It should have a custard-like consistency and may pull away from the sides of the container.
- Patience is Key: It’s important not to disturb the yogurt during incubation. Avoid moving or jostling the bowl, as this can disrupt the fermentation process.
- Monitoring Temperature (Optional): If you’re uncertain about the temperature in your chosen incubation spot, you can use a cooking thermometer to ensure it remains within the desired range.
- Adjusting for Future Batches: Depending on the outcome of your first batch, you can adjust the incubation time for subsequent batches to achieve your desired level of tartness and thickness.
Incubation is where the transformation from milk to yogurt takes place. Providing the right environment and duration ensures that the live cultures have sufficient time to work their magic.
By experimenting with different incubation times, you can tailor your yogurt to your exact taste preferences.
Step 6: Checking for Set
Checking for set is a crucial step in ensuring that your yogurt has reached the desired consistency. Let’s explore this step in more detail:
- Observing Texture and Consistency: After the chosen incubation period, carefully uncover the bowl and take a close look at the yogurt. It should have undergone a transformation from liquid milk to a thicker, custard-like consistency. The surface may appear slightly wrinkled or have a smooth texture, depending on the specific yogurt culture used.
- Testing for Firmness: Gently tilt the bowl to observe the movement of the yogurt. A properly set yogurt will have a degree of firmness and will not flow freely like liquid milk. It should hold its shape when the bowl is tilted.
- Checking for Cohesion: Dip a clean spoon into the yogurt and lift it out slowly. A well-set yogurt will stick to the spoon, forming a clean break, rather than dripping off like milk. The edges of the yogurt on the spoon should be smooth and not separate.
- Evaluating Clean Break: Insert a clean spoon or spatula into the yogurt, then pull it out. A properly set yogurt should have a clean break, where the yogurt holds its shape on the spoon without breaking apart.
- Adjusting Incubation Time (If Necessary): If the yogurt hasn’t set to your satisfaction, you may choose to extend the incubation period by an additional hour or two. Keep in mind that the longer the incubation, the thicker and tangier the yogurt will become.
- Patience is Key: It’s important to exercise patience during this step. Avoid stirring or disturbing the yogurt, as this can disrupt the setting process.
- Troubleshooting: If the yogurt hasn’t set after an extended incubation period, it may be due to issues with the yogurt starter, temperature, or quality of the milk. Troubleshooting can help you identify and address any potential issues for future batches.
Checking for set is the moment of truth in yogurt-making. A properly set yogurt will have a smooth, custard-like texture and hold its shape.
By observing the visual cues and performing simple tests, you can determine if the yogurt is ready for the next steps in the process.
Step 7: Straining (Optional)
Straining yogurt is an optional but highly recommended step for achieving that classic, thick Greek yogurt texture. Let’s dive into the details of this step:
- Purpose of Straining: Straining removes excess whey from the yogurt, resulting in a thicker, creamier consistency. This step is particularly essential if you prefer your yogurt to have a Greek-style texture.
- Selecting a Straining Method: There are a few different methods you can use to strain yogurt:
- Cheesecloth: A clean kitchen towel or cheesecloth is a traditional and effective option for straining. Ensure the cloth is clean and free from any debris or odors.
- Fine-Mesh Sieve or Strainer: If you don’t have cheesecloth, a fine-mesh sieve or strainer can be used as an alternative.
- Yogurt Strainer: Specialized yogurt strainers are available on the market. These are designed to make the straining process even more convenient.
- Setting Up the Straining Process: Place the chosen straining tool over a large bowl to catch the whey. Ensure that the strainer is stable and won’t tip over during the process.
- Pouring the Yogurt: Gently pour the yogurt into the straining tool. If you’ve used a fine-mesh sieve or strainer, you may need to use a spoon to help the yogurt through.
- Allowing the Whey to Drain: Let the yogurt strain for 2 to 4 hours, depending on how thick you want it to be. The longer it strains, the thicker the yogurt will become. You can check on it periodically to gauge the thickness.
- Collecting the Whey: The liquid that drains from the yogurt is whey, which is rich in protein and can be used in cooking or baking. You can collect it in a separate container for later use.
- Storing the Yogurt: Transfer the strained yogurt to a clean container with a lid. Refrigerate for at least 2 hours to chill and further thicken.
- Using the Whey: Don’t discard the whey! It’s a nutritious liquid that can be used in various recipes, such as smoothies, soups, or as a replacement for water in baking.
Straining yogurt is an optional step that can elevate your homemade Greek yogurt to a velvety, luxurious texture.
Experiment with different straining times to achieve the perfect consistency that suits your taste preferences. Remember, the whey you collect can be a valuable addition to your culinary repertoire.
Step 8: Refrigeration
Refrigeration is the final step in the yogurt-making process, and it’s essential for achieving the desired taste and texture. Let’s delve deeper into this crucial phase:
- Purpose of Refrigeration: After straining (if you chose to do so), refrigeration helps cool and set the yogurt further. It also enhances the flavor and allows any residual whey to be absorbed, resulting in a creamier and more consistent texture.
- Transferring the Yogurt: If you strained your yogurt, transfer the strained yogurt into a clean container with a lid. If you opted not to strain, you can skip this step.
- Sealing the Container: Ensure the container is tightly sealed to prevent any external odors or flavors from being absorbed by the yogurt.
- Minimum Refrigeration Time: Refrigerate the yogurt for a minimum of 2 hours. This allows it to chill and set further. Longer refrigeration times can lead to a firmer texture and a more developed flavor profile.
- Flavor Development: As the yogurt sits in the refrigerator, its flavor will continue to develop. This is due to the ongoing activity of the live cultures. The yogurt will become tangier over time, so keep this in mind if you prefer a milder taste.
- Avoid Disturbing the Yogurt: During the refrigeration period, it’s important to avoid stirring or agitating the yogurt. This can disrupt the setting process.
- Storing the Whey (Optional): If you collected whey during the straining process, you can store it in a separate container in the refrigerator. It can be used in various culinary applications, so don’t let it go to waste!
- Checking for Texture and Flavor: After refrigeration, check the yogurt for your desired texture and flavor. If it’s reached your preferred level of creaminess and tanginess, it’s ready to enjoy.
- Optional Flavor Additions: At this stage, you can also add flavorings such as honey, fruit preserves, or vanilla extract to customize the taste to your liking.
Refrigeration is the final step in the yogurt-making journey. It’s where the yogurt achieves its optimal texture and flavor.
By allowing it to chill in a sealed container, you’re ensuring that the live cultures continue to work their magic, resulting in a delicious and nutritious treat.
Remember to adjust the refrigeration time based on your taste preferences. Enjoy your homemade Greek yogurt!
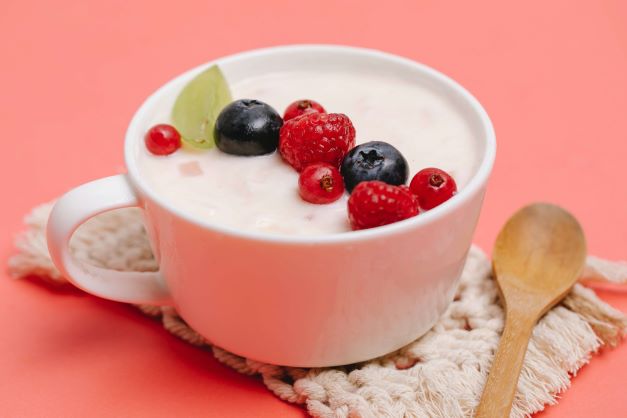
What to Eat With Greek Yogurt?

Greek yogurt is a versatile ingredient that can be enjoyed in a variety of ways. Here are some delicious and nutritious options to eat with Greek yogurt:
- Fresh Fruits and Berries:
- Berries (strawberries, blueberries, raspberries)
- Sliced bananas
- Apple or pear slices
- Kiwi chunks
- Nuts and Seeds:
- Almonds
- Walnuts
- Chia seeds
- Flaxseeds
- Sunflower seeds
- Honey or Maple Syrup:
- Drizzle a small amount of natural sweetener for added flavor.
- Granola:
- Crunchy granola adds a satisfying texture to your yogurt.
- Nut Butter:
- Peanut butter, almond butter, or cashew butter for a creamy, nutty taste.
- Cinnamon or Nutmeg:
- Sprinkle a pinch of these spices for extra flavor.
- Dried Fruits:
- Raisins, dried apricots, or cranberries for a sweet and chewy element.
- Coconut Flakes or Shredded Coconut:
- Adds a tropical twist and a bit of crunch.
- Chocolate Chips:
- Dark chocolate chips or cocoa nibs for a touch of indulgence.
- Savory Options:
- Mix Greek yogurt with herbs, garlic, and lemon juice to create a tangy sauce for grilled meats or vegetables.
- Use it as a base for savory dips or dressings.
- Smoothie Bowl Base:
- Use Greek yogurt as a creamy base for a nutritious smoothie bowl topped with fruits, nuts, and seeds.
- Baked Goods:
- Swap out some or all of the sour cream or mayonnaise in recipes with Greek yogurt for a healthier twist. It works well in muffins, cakes, and creamy salad dressings.
- Vegetables:
- Use Greek yogurt as a dip for raw vegetables, or mix it with herbs and spices to make a creamy salad dressing.
- Savory Parfaits:
- Layer Greek yogurt with roasted vegetables, quinoa, and herbs for a savory parfait.
- Protein-Packed Breakfast:
- Add Greek yogurt to your morning smoothie or enjoy it as a topping on your favorite breakfast cereal or oatmeal.
These are just a few ideas to get you started, but the possibilities are endless. Experiment with different combinations to find what you enjoy most!
What to Make With Greek Yogurt?

Greek yogurt is an incredibly versatile ingredient that can be used in both sweet and savory dishes. Here are some delicious recipes and ideas to make with Greek yogurt:
Sweet Recipes:
- Greek Yogurt Parfait:
- Layer Greek yogurt with fresh fruits, granola, and a drizzle of honey for a nutritious and satisfying breakfast or dessert.
- Smoothie Bowl:
- Blend Greek yogurt with fruits, spinach, and your choice of toppings like nuts, seeds, and berries for a healthy and vibrant breakfast.
- Frozen Yogurt Bark:
- Mix Greek yogurt with honey and spread it on a baking sheet. Top with fruits, nuts, and seeds, then freeze. Break into pieces for a tasty frozen treat.
- Greek Yogurt Pancakes or Waffles:
- Substitute some or all of the milk in your pancake or waffle batter with Greek yogurt for extra protein and a fluffy texture.
- Healthy Salad Dressing:
- Combine Greek yogurt with lemon juice, garlic, and herbs to create a creamy and tangy salad dressing.
- Frozen Yogurt Popsicles:
- Mix Greek yogurt with fruits and honey, then freeze in popsicle molds for a refreshing summer treat.
Savory Recipes:
- Tzatziki Sauce:
- Combine Greek yogurt with cucumbers, garlic, dill, and lemon juice to make a classic Greek sauce that pairs well with grilled meats and vegetables.
- Creamy Pasta Sauce:
- Use Greek yogurt as a base for a creamy pasta sauce, adding herbs, garlic, and Parmesan cheese for flavor.
- Chicken or Tofu Marinade:
- Marinate chicken or tofu in a mixture of Greek yogurt, lemon juice, and herbs before grilling or baking for a tender and flavorful dish.
- Vegetable Dip:
- Combine Greek yogurt with herbs, garlic, and lemon juice to create a creamy dip for raw vegetables.
- Curry Sauce:
- Use Greek yogurt as a base for a creamy curry sauce, adding curry powder, garlic, and ginger for flavor.
- Savory Pancakes:
- Mix Greek yogurt into a savory pancake batter with ingredients like zucchini, feta cheese, and herbs for a unique and flavorful dish.
- Stuffed Bell Peppers:
- Mix Greek yogurt with cooked quinoa, vegetables, and herbs, then stuff it into bell peppers and bake for a protein-packed vegetarian meal.
These are just a few ideas to get you started, but the possibilities are endless. Greek yogurt can be used in a wide range of recipes to add creaminess, protein, and a tangy flavor. Experiment with different combinations to discover your favorite creations!
Related FAQs:
How many carbs are in homemade Greek yogurt?
Based on the method provided earlier for making homemade Greek yogurt, the carbohydrate content will largely depend on the type of milk you use.
Here’s an estimate for the carbohydrate content per 6-ounce (170g) serving of homemade Greek yogurt:
- Whole Milk Greek Yogurt: Approximately 7-8 grams of carbohydrates.
- Low-fat Greek Yogurt: About 8-10 grams of carbohydrates.
- Non-fat Greek Yogurt: Roughly 10-12 grams of carbohydrates.
Keep in mind that these estimates are based on the natural lactose content in milk. If you add sweeteners or flavorings during the process, the carbohydrate content will be higher.
How long can Greek yogurt sit out?
Greek yogurt, like any dairy product, is perishable and should not be left out at room temperature for an extended period of time. It’s important to follow food safety guidelines to prevent the growth of harmful bacteria.
In general, Greek yogurt should not sit out at room temperature for more than two hours. If the temperature is particularly warm (above 90°F or 32°C), this time frame shortens to one hour.
After this time limit, any yogurt that has been left out should be discarded to avoid the risk of foodborne illness. To maximize its freshness and safety, it’s recommended to return any unused portions of Greek yogurt to the refrigerator promptly.
Can I use low-fat or skim milk to make Greek yogurt?
Yes, you can use low-fat or skim milk to make Greek yogurt. However, keep in mind that the yogurt will have a leaner profile and may not be as creamy as yogurt made with whole milk.
What if my yogurt doesn’t set during incubation?
If your yogurt doesn’t set after the incubation period, it could be due to factors like insufficient warmth, expired or inactive yogurt starter, or using ultra-pasteurized milk. You can try extending the incubation time or re-inoculating with a fresh starter.
Can I use non-dairy milk to make Greek yogurt?
Yes, you can use non-dairy milk like almond, soy, coconut, or oat milk to make non-dairy Greek yogurt. Ensure the milk is fortified with calcium and vitamin D for best results.
How long can I store homemade Greek yogurt in the refrigerator?
Homemade Greek yogurt can be stored in the refrigerator for up to 2 weeks. Ensure it’s stored in a clean, airtight container to maintain its freshness.
Can I sweeten or flavor the yogurt before refrigeration?
Absolutely! You can add sweeteners like honey, maple syrup, or sugar, as well as flavorings like vanilla extract or fruit puree, to the yogurt before refrigerating it. Just be sure to mix them in thoroughly.
Is it normal for there to be some liquid on top of the yogurt after refrigeration?
Yes, it’s normal to see a little liquid (whey) on top of the yogurt. You can either mix it back into the yogurt or strain it off for a thicker consistency.
Can I reuse some of my homemade yogurt as a starter for the next batch?
Yes, you can use a small amount of your homemade yogurt as a starter for the next batch. Just be sure to use it within a week or two for best results.
Can I freeze homemade Greek yogurt?
While it’s possible to freeze yogurt, the texture may change upon thawing. It’s best to enjoy it fresh or within the recommended storage period in the refrigerator.
Conclusion
Congratulations, you’ve just created a batch of creamy, homemade Greek yogurt! Experiment with toppings like honey, fresh fruits, or nuts to customize your yogurt to your liking.
Remember, practice makes perfect, so don’t be discouraged if your first attempt isn’t flawless. With time and a little experimentation, you’ll be churning out perfect batches of Greek yogurt in no time!
